
Can I make a DIY dog bandana at home? Yes, you absolutely can make a bandana for your dog at home, even without needing a sewing machine! This guide will show you many easy ways to create a cute tie-on dog accessory for your furry friend.
Making a homemade dog neckerchief is a fun, simple craft. It lets you show off your dog’s unique style without spending a lot of money. Whether you are looking for a no-sew dog scarf or a fully stitched one, we have simple steps for you. Let’s start crafting your pet’s next favorite accessory! This quick pet bandana tutorial will guide you step-by-step.
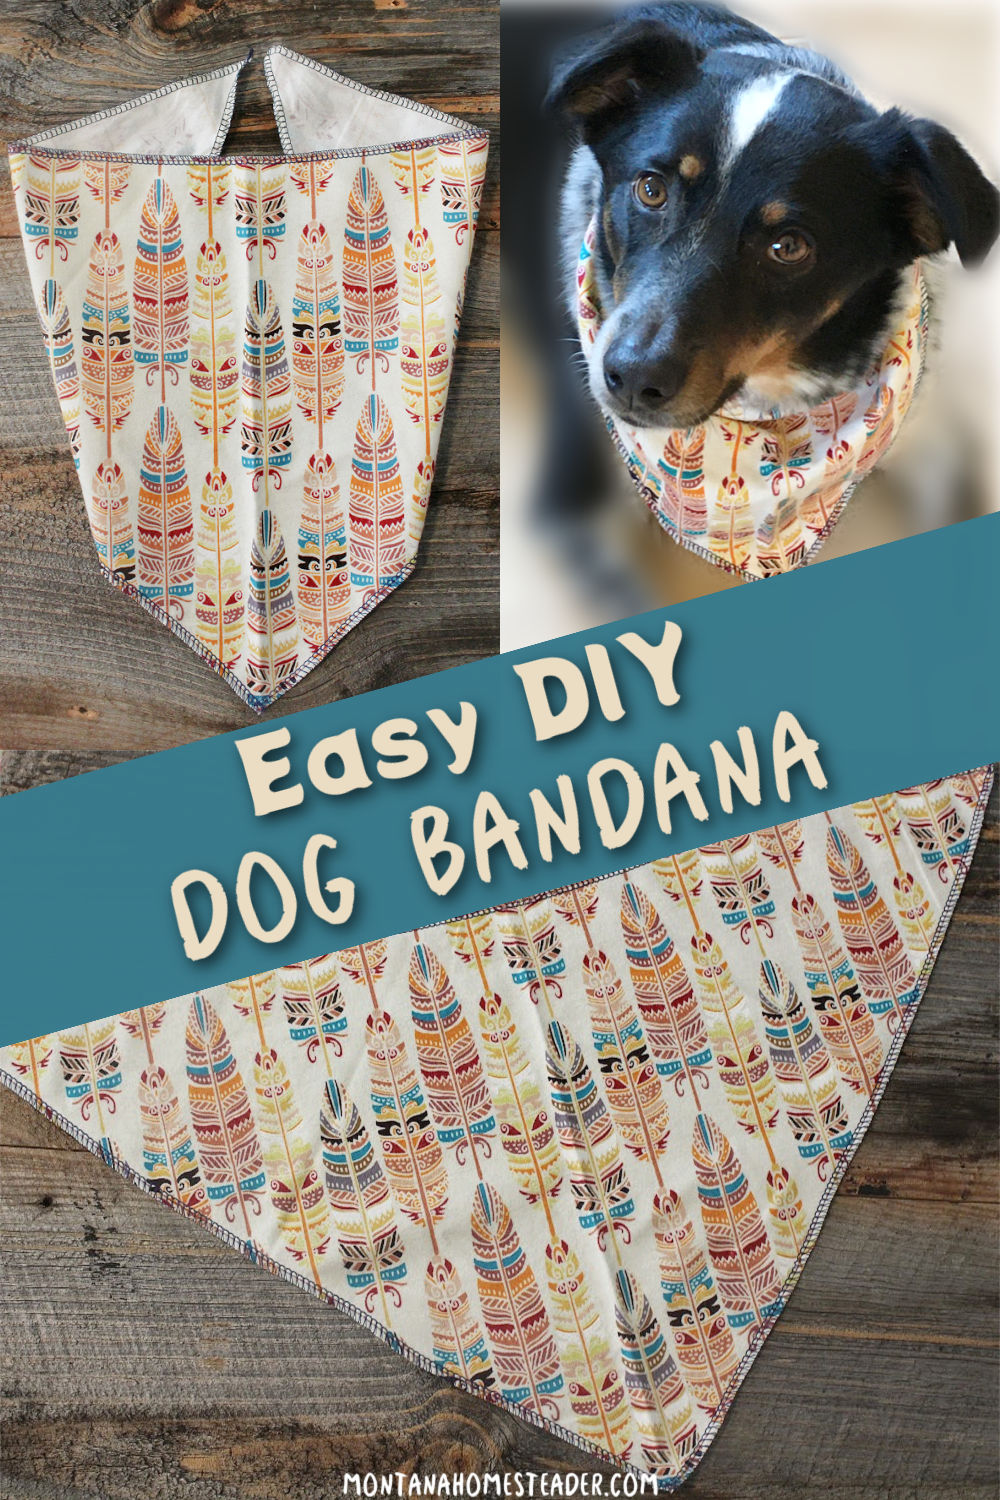
Image Source: montanahomesteader.com
Why Make Your Own Pet Bandana?
There are many good reasons to try bandana making for dogs yourself. Store-bought bandanas are nice, but homemade ones offer special benefits.
Personal Style and Uniqueness
When you make it, you choose everything. You pick the fabric, the colors, and the size. This means your dog wears something truly special. You can match your own clothes or celebrate holidays. This is the best way to create a truly custom dog bandana instructions project.
Perfect Fit Every Time
Dogs come in all shapes and sizes. Finding the right fit in a store can be hard. Making your own lets you adjust the size perfectly. You ensure it is safe and comfortable for your dog’s neck.
Cost Savings
Fabric is often cheap, especially if you use remnants. Using fabric scraps dog bandana projects helps save money. It is much cheaper than buying new ones often.
Fun Crafting Activity
Bandana making for dogs is a relaxing hobby. It uses simple tools and basic skills. It is a great project for a rainy afternoon.
Deciphering Dog Bandana Sizes
Before you cut any fabric, you need to know how big to make the bandana. A good fit is key for safety and comfort. A bandana that is too tight can choke your dog. One that is too big can get caught on things.
Measuring Your Dog
First, measure your dog’s neck. Use a soft tape measure. Wrap it loosely around the neck where the collar usually sits. You want to be able to fit two fingers between the tape and the dog’s neck. This space is important for comfort.
Size Chart Guide
Once you have the neck measurement, use this chart to guide your fabric size. Remember, for tie-on styles, you need extra length for the ties.
| Dog Size | Neck Measurement (Inches) | Bandana Width (Inches) | Bandana Height (Inches) |
|---|---|---|---|
| Extra Small (Puppy/Toy) | 8–10 in | 16 in | 7 in |
| Small (Chihuahua/Terrier) | 10–14 in | 19 in | 8 in |
| Medium (Beagle/Spaniel) | 14–18 in | 22 in | 10 in |
| Large (Labrador/Golden) | 18–22 in | 26 in | 12 in |
| Extra Large (Great Dane) | 22+ in | 30+ in | 14+ in |
These dimensions are for a standard square or triangle shape before folding. Adjust the width based on how much tie length you want.
Method 1: The Quick Pet Bandana Tutorial (No-Sew Option)
This is the fastest way to make a DIY dog bandana. It is perfect if you are new to crafting or need an accessory right away. This creates a no-sew dog scarf effect.
What You Need
- A square piece of fabric (choose a light, breathable material like cotton).
- Scissors.
- A ruler or measuring tape.
Steps for the No-Sew Tie-On
- Select Your Fabric Piece: Cut a perfect square of fabric. Use the size chart above for guidance. For example, for a medium dog, start with a 22-inch by 22-inch square.
- Create the Triangle: Take your square fabric. Fold it diagonally in half to make a large triangle. Match the corners well.
- Roll for the Scarf Effect: This is the secret to the no-sew dog scarf. Starting from the longest edge (the base of the triangle), begin rolling the fabric toward the point. Roll it tightly but smoothly. Keep rolling until you have a long, narrow strip.
- Check the Length: Hold the rolled strip against your dog’s neck. It should wrap all the way around with enough length left over to tie a simple knot or bow on top. If it is too short, carefully unroll it and use a larger square next time.
- Tie It On: Once the length is right, place the center of the rolled strip under your dog’s neck. Bring the ends up over the top and tie them securely. Make sure the knot is snug but loose enough for comfort.
This method is great for thin, lightweight materials. It makes a simple, stylish tie-on dog accessory.
Method 2: The Easy Pet Bandana for Dogs (Sewn Triangle)
This method results in a classic, durable bandana shape. It is still considered an easy pet bandana for dogs project, even with sewing. This uses a proper dog bandana pattern.
What You Need
- Two squares of fabric (or one large rectangle if you prefer reversible).
- Sewing machine or needle and thread.
- Scissors.
- Ruler and fabric marker (chalk or washable pen).
- Iron and ironing board.
Preparing the Dog Bandana Pattern
You need to cut the fabric into a specific shape for the classic look.
Creating the Pattern Shape
The easiest dog bandana pattern is based on a square that gets folded into a triangle.
- Determine Size: Use your measurements from the chart. Let’s aim for a finished size of 12 inches high by 24 inches wide (a large size).
- Cut Fabric: Cut two rectangles of fabric that are 13 inches tall by 25 inches wide. (Adding 1 inch to height and width allows for the seam allowance).
- Mark the Diagonal: Take one piece of fabric. Lay it flat. Mark a line from one corner to the opposite corner. This is the center fold line for your triangle shape.
Sewing Instructions for the Classic Bandana
- Place Fabrics Together: Place your two fabric rectangles right sides together (the pretty sides facing each other). Pin them all around the edges. Make sure the marked diagonal line is aligned on both layers.
- Sew the Edges: Begin sewing along the edge, about 1/2 inch from the edge. Sew around the entire perimeter, leaving a 3 to 4-inch gap open on one of the straight sides (not the diagonal side). This gap is your turning hole.
- Clip the Corners: Before turning, trim the fabric right near the corners, but do not cut the stitches! This makes the points sharp when turned right side out.
- Turn Right Side Out: Use the gap you left to gently pull all the fabric through. Use a dull pencil or turning tool to push out the corners neatly.
- Ironing: Iron the entire bandana flat. Make sure the edges look crisp and neat. Use the iron to press the seam allowance of the turning hole inward neatly.
- Closing the Gap: Topstitch close to the edge all the way around the bandana. As you reach the turning gap, stitch across it to close it securely. This topstitching adds a professional look and strengthens the edges.
Adding the Tie Ends (Optional for Tie-On Style)
If you want a stronger tie section, you can use this step. If you are fine with just tying the fabric ends together (as in Method 1), skip this.
- When cutting your initial rectangles (Step 2 above), make the side edges slightly longer (e.g., 27 inches instead of 25 inches).
- Sew the main body as described.
- For the extra 2 inches on each end, fold those edges in twice (like a hem) and sew a straight line down each long side to create a neat, thick tie section. This is great for bandana making for dogs where you want durability.
Method 3: The Pocket Bandana (Slips Over the Collar)
Many owners prefer bandanas that slip directly over the collar. This means no knots that can come undone or feel uncomfortable. This variation of the DIY dog bandana is very secure.
What You Need
- One piece of fabric (rectangle is easier for this style).
- Sewing supplies (needle/thread or machine).
- Ruler and scissors.
Steps for the Collar Pocket Bandana
- Determine Size: Decide how wide your dog’s collar is. You need the opening (the pocket) to be slightly wider than the collar to allow it to slide on easily. Let’s aim for a 1.5-inch wide pocket for a standard collar.
- Cut Fabric: Cut a rectangle. The length should be about 24 inches (for a medium dog) and the height should be about 9 inches.
- Create the Pocket Opening: Take the short edge of the rectangle. Fold it over 1/2 inch to the wrong side and press. Fold it over another 1 inch and press again. Sew a straight line close to the inner folded edge. This finishes one end beautifully and creates the first part of the pocket sleeve.
- Shape the Triangle: With the finished edge (the pocket opening) facing up, fold the fabric in half lengthwise so the long sides meet. The finished pocket edge should be one of the top corners. You are creating a large, long triangle shape again.
- Sew the Long Edge: Pin the long raw edges together. Sew them using a 1/2 inch seam allowance. Do not sew the other short end yet—that’s where the collar slides through!
- Turn and Finish: Turn the piece right side out. Iron it flat. The edge you just sewed becomes the bottom point of the triangle. The unsewn end is the top opening.
- Form the Second Pocket Edge: At the unsewn end, measure down about 1.5 inches from the top edge. Fold that section over 1/2 inch and press. Fold it over another 1 inch and press firmly. Sew this edge down securely. This completes the sleeve where the collar slides through.
Your dog’s collar slides through the top opening, and the fabric hangs down like a triangle, creating a secure homemade dog neckerchief.
Choosing the Right Fabric for Your Dog
The fabric choice affects how the bandana looks, how long it lasts, and how comfortable your dog feels wearing it. This is crucial for any custom dog bandana instructions.
Best Fabrics
- 100% Cotton: This is the gold standard. It breathes well, washes easily, and holds prints nicely. It is the best choice for warm weather.
- Flannel: Great for colder months. It’s soft and thick.
- Lightweight Linen Blends: Offers a nice texture and good breathability, though it wrinkles easily.
Fabrics to Avoid
- Heavy Synthetics (like thick polyester): These do not breathe. They can trap heat and cause skin irritation, especially if your dog is active.
- Fabrics with Small, Dangling Parts: Avoid sequins, beads, or fringe. These can be choking hazards if your dog chews on the bandana.
Utilizing Fabric Scraps Dog Bandana Projects
If you have leftover quilting cotton or old shirts, this is the perfect project.
- Patchwork Style: If you have many small pieces, sew them together into a larger square first. Then, follow the cutting directions for the triangle pattern. This creates a colorful, unique look.
- Using Old T-shirts: Old, soft T-shirts work great for the no-sew dog scarf method. The knit fabric is very soft on the neck. Just ensure the shirt fabric is clean and lint-free.
Advanced Customization Techniques
Once you master the basic shapes, you can start customizing your DIY dog bandana.
Iron-On Transfers and Vinyl
You can add names, paw prints, or graphics easily.
- Iron-On Transfers: Print your design onto special transfer paper. Iron it directly onto the finished, clean bandana fabric according to the paper instructions.
- Heat Transfer Vinyl (HTV): If you have a cutting machine (like a Cricut or Silhouette), you can cut letters or shapes from HTV. Place the vinyl onto the fabric and use a heat press or iron to adhere it. This gives a professional, durable look to your custom dog bandana instructions.
Embellishments (Use with Caution)
For very well-behaved dogs who do not chew their accessories, you can add light embellishments.
- Embroidery: Stitch simple designs directly onto the fabric before sewing the pieces together. This adds texture.
- Piping: Add decorative piping (a fabric-covered cord) around the edges during the sewing stage (Method 2). This gives a very polished finish.
- Ruffles or Trim: Sew a piece of lace or decorative trim onto the long, outer edge of the triangle before turning it right side out.
Safety Note: Always ensure any additions are firmly attached and will not detach or become a hazard if chewed or vigorously played with.
Maintenance and Care for Homemade Bandanas
A well-loved tie-on dog accessory needs good care. Washing instructions depend heavily on your fabric choice.
Washing Guidelines
- General Rule: Wash cold water on a gentle cycle. This prevents colors from bleeding and reduces stress on the seams.
- Drying: Air dry whenever possible. High heat in a dryer can cause cottons to shrink significantly or cause vinyl/transfers to peel.
- Spot Cleaning: For small spots between washes, use mild soap and water directly on the stain.
If you used an iron-on transfer, always turn the bandana inside out before washing to protect the design. Following these steps ensures your easy pet bandana for dogs stays looking great for a long time.
Troubleshooting Common Bandana Making Issues
Sometimes projects don’t go as planned. Here are solutions for typical problems encountered during bandana making for dogs.
| Problem | Cause | Solution |
|---|---|---|
| Bandana is too tight/small. | Measurements were off, or fabric shrunk. | If sewn, gently pull out the center seam slightly, or use the next size up next time. If no-sew, start with a larger square. |
| Corners look dull/rounded. | Corners were not clipped deeply enough before turning. | If possible, carefully trim the excess fabric near the tip from the inside without cutting the seam. Next time, clip closer to the point. |
| Bandana flops or droops heavily. | Fabric is too heavy, or the shape is too large for the dog’s size. | Use lighter fabric (like quilting cotton instead of denim) for future projects. Ensure the height matches the dog’s neck size properly. |
| No-sew roll keeps unraveling. | Fabric is too slippery (like silk or satin). | Use a small dot of fabric glue or a few tiny hand stitches to secure the roll every few inches. This works best for a no-sew dog scarf. |
Frequently Asked Questions (FAQ) About DIY Dog Bandanas
Here are some common questions people have when starting their DIY dog bandana journey.
Q1: Do I need to hem the edges if I use the no-sew method?
A: No, hemming is not necessary for the rolled, no-sew dog scarf style. The rolling technique tucks the raw edges inside the roll, creating a clean look. If the fabric frays excessively after washing, you might need to trim the edges or switch to a method that includes sewing.
Q2: How do I make sure the bandana doesn’t slip down when my dog runs?
A: The best way to prevent slipping is to use the collar-slide method (Method 3). If you prefer the tie-on dog accessory, ensure the knot is secure but not too tight. For extra security, you can add a loop of elastic or a small snap closure near the knot area to keep the ends from flapping loose.
Q3: Can I use old bandanas to make a new one?
A: Yes! This is a fantastic way to reuse favorite patterns. If the old bandana is already the right size, you can trace your new dog bandana pattern onto the old one. If the old one is too small, use it as a template or cut sections for a fabric scraps dog bandana patchwork design.
Q4: What is the easiest way to get the pointed look for a homemade dog neckerchief?
A: The easiest way is to start with a square piece of fabric and fold it diagonally to form a large triangle. Then, fold that triangle in half again from the point to the center of the long edge. This folding technique naturally creates the classic, sharp-pointed shape seen in most easy pet bandana for dogs designs.
Q5: Are there patterns available for small dogs that are different from large dogs?
A: Yes, while the basic shape remains the same (a triangle), the scaling is different. Small dog patterns require shorter tie lengths and less overall fabric width to avoid overwhelming their smaller frame. Always use your neck measurement to scale the width of your dog bandana pattern for the best results.