
Can I give my dog subcutaneous fluids at home? Yes, many pet owners can learn how to administer subcutaneous fluids to a dog at home, but only under the direct instruction and prescription of a licensed veterinarian. This process, often called dog fluid therapy at home, is a crucial part of managing dehydration or certain chronic illnesses like kidney disease.
Administering fluids under the skin might sound scary at first. However, with the right training and sterile practice, it becomes a straightforward part of your dog’s care routine. This guide breaks down the steps for dog subcutaneous fluid administration simply and clearly.
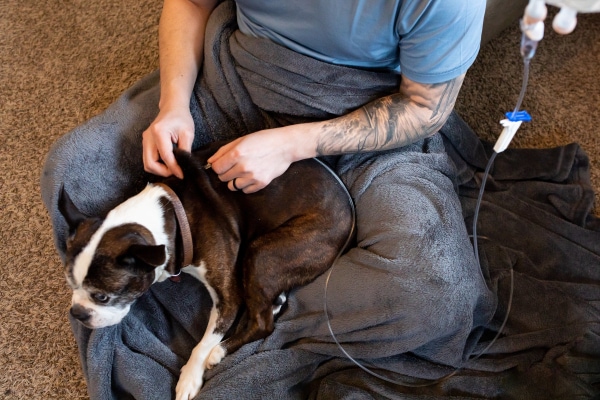
Image Source: toegrips.com
Why Your Vet Might Prescribe Subcutaneous Fluids
Subcutaneous fluids go just under the skin. They help the body reabsorb water slowly. This is vital when a dog cannot drink enough water or has lost too much fluid.
Common reasons for needing dog dehydration fluid treatment at home include:
- Chronic Kidney Disease (CKD)
- Severe vomiting or diarrhea leading to dehydration
- Post-operative recovery support
Your veterinarian will calculate the exact amount and type of fluid needed. Never start this treatment without a vet’s approval and precise dosing instructions.
Gathering Your Supplies: Preparing for the Injection
Getting everything ready before you start makes the subcutaneous fluid injection dog owners must perform much easier. Organization is key to keeping the process quick and calm for your pet. You must always use a sterile technique subcutaneous fluids dog care demands.
Essential Items Checklist
| Item | Purpose | Notes |
|---|---|---|
| Prescribed Fluids | Lactated Ringer’s Solution (LRS) or 0.9% Saline | Must be room temperature. |
| Needles & Syringes | Appropriate size for the volume given | Vets usually suggest 18 or 20 gauge needles. |
| IV Tubing/Bag (For Large Volumes) | Connects fluid bag to the needle | Needed if giving more than 100ml. |
| Alcohol Wipes or Chlorhexidine | To clean the skin area | Do not use alcohol if the dog is sensitive. |
| Treats | Positive reinforcement | Essential for keeping your dog happy. |
| Towel or Blanket | For comfort and gentle restraint | Helps keep the dog still. |
Warming the Fluids
Cold fluids can be uncomfortable when administering dog fluids under skin. Always warm the fluid bag gently.
- Place the sealed bag in a sink filled with warm (not hot) tap water.
- Let it sit for 15–20 minutes.
- Do not microwave the fluids. Microwaving causes dangerous hot spots.
Mastering the Canine Subcutaneous Fluid Technique
The technique for administering dog fluids under skin relies on finding loose skin where the fluid can spread out easily. This area absorbs the fluid slowly, preventing discomfort.
Step 1: Setting the Scene and Handling Your Dog
Keep the area calm. Choose a quiet spot. Sit on the floor or a low couch.
- Calm Your Dog: Talk softly to your dog. Give them a slow, gentle massage first. A happy dog is a still dog.
- Positioning: For most dogs, having them stand or sit comfortably is best. Some smaller dogs might need to lie on their side.
- Restraint: You need light restraint. Have a helper gently stroke your dog’s head or offer constant treats. You need one hand free to pinch the skin.
Step 2: Locating the Injection Site
The best spot for canine subcutaneous fluid technique is usually over the shoulder blades, near the mid-back. This area has plenty of loose skin and fewer major nerves or blood vessels.
- Pinch the Skin: Gently lift a fold of skin between your thumb and forefinger.
- Check for “Tent”: When you lift, the skin should form a small “tent.” This shows there is space below the skin.
- Check the Space: Gently poke the area near the tent with a clean finger. If it feels loose and puffy, it is a good spot.
Step 3: Preparing the Needle and Injection
Use the correct supplies recommended by your vet. If you are using a fluid bag and tubing, make sure all air is out of the line first.
- Draw Fluid: If using a syringe, draw up the exact amount prescribed by your vet.
- Clean the Site: Wipe the chosen spot with an alcohol swab. Let the area air dry completely. This ensures sterile technique subcutaneous fluids dog care requires.
- Needle Insertion: Hold the skin fold firmly with your non-dominant hand. Hold the syringe like a dart in your dominant hand.
- Aiming: Insert the needle quickly and smoothly into the base of the skin fold. You should feel little to no resistance. The goal is to go into the tented space, not through to the other side.
Important Tip: If you poke all the way through the skin fold, pull back slightly until you are back in the pocket of loose skin.
Step 4: Administering the Fluids
This is the slowest part. Move slowly to avoid pain and allow absorption.
- Aspiration (Optional but Recommended): Gently pull back on the plunger slightly after the needle is in place. If you see blood in the syringe, you have hit a blood vessel. Pull out, discard the syringe/needle, and start over in a new spot. If you see only clear fluid or nothing, you are in the right place.
- Inject Slowly: Begin pushing the plunger smoothly and slowly. Slow injection minimizes bulging and discomfort.
- Watch the Skin: As the fluid goes in, a small lump or bubble will form under the skin. This is normal. If the dog shows pain, stop, pull back, and try again very slowly.
- Finish: Once the full dose is given, withdraw the needle quickly, using the same motion as insertion (straight out). Immediately press a clean, dry gauze pad or cotton ball onto the site for a few seconds. Do not rub the area. Rubbing can cause the fluid to leak out.
Post-Injection Care and Monitoring
What happens after the subcutaneous fluid injection dog receives is as important as the injection itself. Proper monitoring helps ensure the treatment is working correctly and safely.
Fluid Absorption
The injected fluid should feel like a small, squishy lump under the skin for a while. Over the next few hours, your dog’s body will slowly absorb this fluid into the bloodstream.
- Good Absorption: The lump should flatten out within 6 to 12 hours.
- Slow Absorption: If the lump remains hard or large after 24 hours, contact your vet. The injection site might need changing next time, or the fluid volume might be too high.
Checking for Complications
While rare with proper technique, complications can occur. Know what to watch for when administering dog fluids subcutaneously.
- Localized Swelling: Mild swelling at the site is normal. Excessive hardness, heat, or tenderness is not normal.
- Leakage: If fluid leaks out immediately, it means the needle went through both layers of skin. Apply pressure and clean the area.
- Lethargy or Pain: If your dog seems unusually sore or tired after the fluids, call your vet.
Recognizing Signs of Fluid Overload
It is vital to follow your vet’s dosage exactly. Giving too much fluid can cause serious issues like dog fluid overload symptoms.
Signs that your dog may have received too much fluid too quickly:
- Panting heavily, even when resting.
- Restlessness or agitation after the injection.
- Coughing or difficulty breathing (this is an emergency!).
- Severe puffiness or fluid accumulation in other areas.
If you suspect dog fluid overload symptoms, contact your veterinarian immediately.
Variations in Technique Based on Fluid Volume
The supplies and technique change based on how much fluid your dog needs daily. Vets calculate this based on weight and need.
Small Volume Administration (Under 60 mL)
For very small dogs or minor fluid boosts, a simple syringe is often used.
- Use a 3 mL to 10 mL syringe.
- Needle size is often 22 gauge for small dogs.
- The process is quick: draw, clean, inject, done.
Large Volume Administration (Over 100 mL)
When dogs need larger amounts, using a full IV bag and administration set is more efficient than refilling many syringes.
- Setup: Spike the fluid bag with the administration set.
- Prime the Line: Open the clamp and let the fluid run through the entire tube until all air bubbles are gone. Clamp the line shut.
- Connecting: Attach the needle tip to the end of the administration set tubing.
- Injection: Follow the insertion steps above. Instead of pushing a plunger, you slowly open the clamp on the tubing to allow gravity to push the fluid into the pocket under the skin. Monitor the bag level closely to ensure you stop at the correct volume.
This method helps achieve a slow, steady infusion, which is generally better tolerated during canine subcutaneous fluid technique.
Tips for Making Home Administration Easier
Success in dog fluid therapy at home relies heavily on positive association and practice.
- Practice Makes Perfect: Practice the “pinch” technique without a needle first. Let your dog get used to you handling the skin fold.
- The Treat Train: Associate the procedure with the best treats they have ever tasted. A smear of peanut butter on a lick mat while you work can be a lifesaver.
- Rotate Sites: Never use the exact same spot twice in a row. Rotate injection sites across the entire back and sides of the rib cage area to prevent scar tissue and skin hardening. Mark down which spots you have used.
- Stay Confident: Dogs pick up on your anxiety. Take a deep breath. Move calmly and deliberately. Your confidence reassures your pet.
- Clean Up Immediately: Properly dispose of used needles in a designated sharps container (a hard plastic laundry detergent bottle works well until you can dispose of it safely at a pharmacy or vet clinic). This protects everyone in the house.
Interpreting Veterinary Subcutaneous Fluid Guidelines
Your veterinarian provides personalized veterinary subcutaneous fluid guidelines. These documents are your absolute roadmap.
Guidelines should clearly state:
- Fluid Type: (e.g., LRS, 0.9% Saline)
- Dose Per Session: (e.g., 250 mL)
- Frequency: (e.g., Once every 12 hours, or every other day)
- Injection Site Rotation Plan: (e.g., Left shoulder area, then right flank, then lower back).
Crucial Note on Chronic Kidney Disease: When treating CKD, the goal is often maintenance hydration. If your dog starts drinking much more water than normal, inform your vet. Excessive drinking can sometimes mean the subcutaneous fluids are no longer needed, or the underlying disease has progressed.
FAQ Section
Q: How long does it take for the fluids to absorb?
A: Typically, it takes a few hours for the fluid pocket to fully absorb. Small amounts (under 50 mL) may absorb quickly. Larger amounts (over 200 mL) can take up to 12 hours to completely flatten.
Q: Can I give my dog fluids intravenously (IV) at home?
A: No. IV fluids must go directly into a vein. This requires special training, constant monitoring, and sterile conditions to prevent severe infection or dangerous speed of infusion. IV fluid therapy is strictly a hospital procedure. We only focus here on how to give dog fluids subcutaneously.
Q: What if my dog won’t stay still for the subcutaneous fluid injection dog owners need to give?
A: Try making the process as short as possible. Offer high-value rewards continuously. If resistance is high, enlist a helper. If the dog still panics, you may need to give a mild sedative prescribed by your vet for the injection time only. Never force the procedure if it causes extreme distress.
Q: Should I be worried about lumps after administering dog fluids under skin?
A: A soft, fluid-filled lump is expected immediately after administering dog fluids subcutaneously. If the lump becomes hard, hot, painful to the touch, or does not disappear within 24 hours, this may indicate poor absorption or localized irritation. Contact your vet for advice on the next session.
Q: Can I reuse needles for dog subcutaneous fluid administration?
A: Absolutely not. Needles become dull very quickly. Reusing them causes significant pain, tears tissue, and increases the risk of infection. Always use a new, sterile needle for every injection session.